
ECRS Dasboard User Manual
3.1.1.1 Kits and devices section
3.1.2.2 Monitor the existing devices
3.1.3.2 View the information of a specific kit
3.2.1.1 Section of patients, candidates and participants
3.2.2 Creation and management of patients
3.2.2.1 Register new candidates and complete baseline data
1. INTRODUCTION
1.1 Purpose of the manual
The Electronic Clinical Report Services (ECRS) Dashboard of the TOLIFE project is a powerful web application, available in English, Spanish, Italian, and German. Its main objective is to facilitate the management of the two pilots that will be carried out, providing access to reliable information, facilitating communication between different roles, and offering useful statistics to speed up the decision-making process. To achieve this, this tool is divided into different pages with customized functionalities based on the user’s role.
This user manual is a comprehensive guide to understanding and maximizing the web tool, providing detailed information for each type of user. Each section has been designed through a collaborative process in different refinement phases, considering the specific needs and responsibilities of the roles involved.
1.2 Tool requirements
For the proper visualization and functioning of the ECRS Dashboard, it is important that the user uses an updated web browser (Chrome, Firefox, Edge, Safari, etc.) in full-screen mode and a screen resolution of 1920 by 1080 px. Otherwise, the user may not be able to see all the elements that make up the tool and/or may experience incorrect functioning.
1.3 User roles and permissions
In the ECRS Dashboard, there are three possible user roles:

Technicians
They are responsible for registering in the ECRS Dashboard the devices that will be used by the patients.
- They can register new devices manually or through a standardized file in CSV format.
- They can delete existing devices if they have made a mistake in registering them, as long as they are not yet part of a kit.
- They can view the created devices and review their general operation.
- They can download the data sent by all sensors of a specific device during the last day, or alternatively select a specific period and download the data from each sensor of the device separately
- They can manage devices under review and allow their use again or deactivate them depending on whether the correct operation has been restored or not.
- They can manually create new kits.
- If necessary, they can replace one or more devices in a kit.
- They can delete existing kits if they have made a mistake in creating them, as long as they have not yet been assigned to a patient.
- They can view the created kits and see details about their contents, as well as review the operation of the devices they contain.
- They can view and manage alerts generated by devices or other users.
- They can generate new alerts and choose which type of users and pilot site they are sent to.
- They can access their profile information and change their user password.
Data managers
They are the healthcare staff of each site where the Clinical Study takes place.
- Only they can access clinical data of patients related to their center.
- They can register patients associated with their center, who will become candidates for the Clinical Study.
- During the in-person visit with a candidate, they can complete the questionnaire process based on which it will be decided if the patient becomes a participant in the Clinical Study. If the minimum requirements are met, they can assign the participant a kit from those available at their pilot site.
- They can review the general operation of the kit assigned to a specific participant.
- They can request the replacement of one or more devices in a participant’s kit.
- They can fill out available questionnaires for each participant according to the Clinical Study period, and lock them once completed.
- Once the Clinical Study is finished, or in case of participant dropout, they can disassociate the kit from the participant.
- They can view and manage alerts generated by devices or other users.
- They can generate new alerts and choose which type of users and pilot site they are sent to.
- They can access their profile information and change their user password.


Super managers
They are responsible for coordinating and supervising the ongoing Clinical Study.
- They will have permissions and functionalities on future versions of the tool.
1.4 Important notes
This manual is designed to provide a detailed guide on the functionalities of the web tool.
Each specific section of the role provides step-by-step instructions and screenshots to facilitate understanding.
It is recommended to read the manual in its entirety before using the tool.
2. TOOL ACCESS
2.1 Login page
Once the user is familiar with the concept and objectives of the TOLIFE ECRS Dashboard, the first step is to click on this link:
http://ecrf.tolife.avvale.com/
Next, the user will be redirected to the login page.
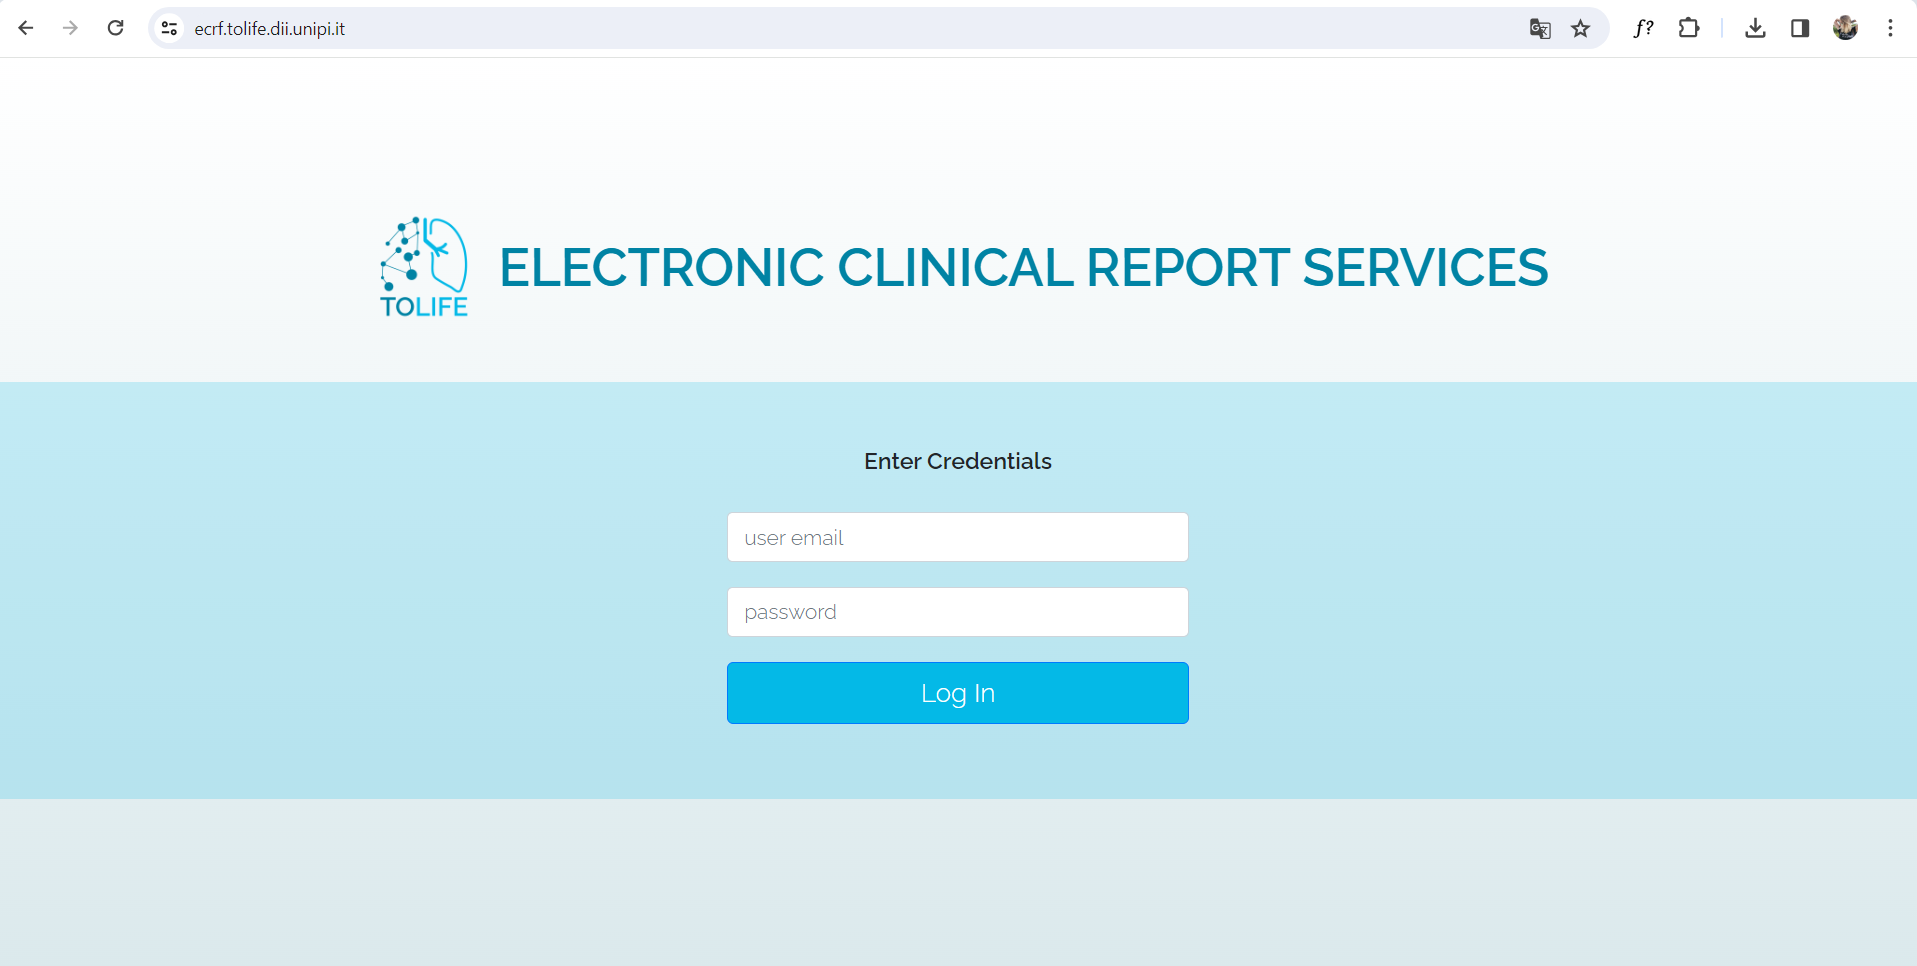
To access, the user must follow these steps:
- In the first field, enter the email address assigned to you. This will be the unique identifier for the user on the platform and cannot be modified.
- In the second field, provide the password associated with the account. The user must ensure to type it correctly, as the check is case-sensitive.
- After entering the email and password, click on the login button.
It is essential for the user to maintain the confidentiality of their credentials to ensure the security of their account.
If it is the user’s first time logging in, the system will require them to change their password within the profile page, so the user has the option to change the original password assigned to one that is more familiar. To do this, they must enter the new password twice and click on the save button. It is important for the user to remember the new password set to log in again in the future.

Once the password has been updated, the system will notify the user, and they will be able to access the main page of the tool by entering their login credentials again.

2.2 Password recovery
This functionality will be implemented in a future version of the tool.
3. ROLE-SPECIFIC CONTENT
3.1 For the technician role
3.1.1 Main page
It is the first screen shown after the user logs in. At the top, the title of the tool appears along with a button to access the user’s profile page. As for the content, it is divided into 3 sections related to: kits and devices, alerts, and an interactive graph.
The first time the user logs in, there will be no registered devices, no kits created, and no alerts generated. Therefore, there will be no information to be displayed.

3.1.1.1 Kits and devices section
In the left section, a menu allows switching between tabs for managing kits or devices.
- The kits tab includes: a button to create new kits, the list of existing kits, and filters (based on pilot site and status) that can be applied to the list.

- The devices tab includes: a button to register new devices, and the list of existing devices.

3.1.1.2 Alerts section
The top right section is used to manage the alerts generated during the course of the pilot.
For more information, refer to section 4.1 of the manual on the alerts functionality.
3.1.1.3 Graphic section
The bottom right section consists of an interactive graph that displays a summary of the existing kits and their status.

3.1.2 Devices
This section details the functionalities related to the registration, monitoring, and deletion of the devices that will be used by the patients during the Clinical Study.
3.1.2.1 Register new devices
On the new device registration page, two methods are provided.

A) Manually register of devices
By entering in the corresponding section for the sensor type: the name (of type AA-XXX where AA is the code indicating the type of device, as indicated in Table 1) and the serial number. The user must enter a pair of data (one line in the name box and another in the serial number box) for each device they wish to register. It is essential for the user to ensure that these pairs are correctly matched and there are no more rows of data in one box than in the other. For the «left shoe» and «right shoe» devices, it will also be necessary to specify the foot size data. It is important for the user to complete this process by clicking on the «register sensors» button.
| Device | "AA" | Name example |
|---|---|---|
| Smartphone | SP | SP-001 |
| Smartwatch | SW | SW-001 |
| Left smartshoe | LS | LS-001 |
| Right smartshoe | RS | RS-001 |
| Mattress | MT | MT-001 |
| Spirometer | SM | SM-001 |
| Modem | MO | MO-001 |
| Environmental sensor | EN | EN-001 |
Table 1: Code for the name of each device
B) Register of devices via csv file
Through a CSV file, for which the user must first download the provided template by clicking on the button indicating so, then complete it, and finally upload it to the tool through the «select file» button. It is important for the user to complete this process by clicking on the button to save the uploaded CSV file so that the system incorporates the provided data.

The system will display an error message if one or more of the provided data (both name and serial number) already exist, and such device will not be registered. The rest will be registered.
3.1.2.2 Monitor the existing devices
In the devices tab, the list of existing devices is displayed, classified by type. Clicking on each item in the list allows access to a page where the detailed list of devices of the selected type appears. In this list, for each item, the device name, its serial number, its status, the ID of the kit to which it belongs (if any), the last synchronization, the creation date, and two possible actions are shown:

When clicking on this button, a new screen appears with a form where the user must fill in the date range relative to the data download they wish to perform.

Once the initial and final dates are selected, clicking on the «Continue» button displays a button for each sensor of the device from which data can be obtained (Figure 12). By clicking on each button, a JSON file is downloaded.

This functionality is only active if the device is not assigned to any kit. By clicking on the «Delete» button, the device disappears from the list. It is important for the user to be sure they want to delete the device before clicking it, as there is no double confirmation in this version.
![]()
3.1.3 Kits
In this section, the functionalities related to the creation, editing, and deletion of the kits to be assigned to the patients during the Clinical Study are detailed.
3.1.3.1 Create new kits
It’s important to clarify that in order to create new kits, it’s essential for the user to first register the devices that compose the kits (and that these are in available status) since each kit must obligatorily contain one device of each type.

When there are at least one sensor of each type available, the page for creating new kits is displayed.

On this page, the user must indicate (through dropdown selection fields) the pilot site and the names of each of the devices (one per type) that will be included in the kit. Additionally, they must enter the name of the kit to be created and click on the ‘Register new kit’ button to complete the process. If no error message is displayed, it means that the kit has been registered successfully.
3.1.3.2 View the information of a specific kit
By clicking on the name of a kit from those listed on the main page, the detailed information regarding that kit is displayed.

On this page, the user can consult the status, pilot site, and creation date of the kit, as well as the devices that compose it (their name and serial number). By clicking on the ‘Edit kit’ button, editing of the devices it contains is allowed, enabling the user to change the names of the devices to replace them with another one that is registered and available. Clicking on the ‘Update kit’ button saves the changes made.

By clicking on the ‘Update kit’ button, the kit information is updated to the latest version.
The ‘Delete kit’ button only appears if the kit has not yet been assigned to a patient. When clicked, the kit is deleted. It’s important for the user to be sure before clicking it, as this version does not have double confirmation.
3.2 For the data manager role
3.2.1 Main page
It is the first screen displayed after the user logs in. At the top, the title of the tool and a button to access the user’s profile page are shown. As for the content, it is divided into 3 sections related to: patients, candidates, and participants, alerts, and an interactive graph.

The first time the user logs in, there won’t be any registered candidates, patients, or generated alerts. Therefore, this information won’t exist to be displayed.
3.2.1.1 Section of patients, candidates, and participants
On the left-hand side, a menu allows switching between tabs for managing participants, candidates, and non-participants. Additionally, there is a button to register new candidates, the ability to sort the list, and a filter (according to status) applicable to the visible list.
- Participants are candidates who, after completing the baseline questionnaires, are allowed to participate in the Clinical Study. They have 5 possible statuses:
- Recruited: a patient who has not yet been assigned a kit.
- Active: a patient with an assigned kit. If they have all questionnaires up-to-date, it is displayed in green; if any are pending, it is displayed in yellow.
- Withdrawn: a patient who has voluntarily withdrawn from the Clinical Study.
- Removed: a patient removed from the Clinical Study by the data manager, due to a specific reason.
- Finished: a patient who has successfully completed the Clinical Study.
- Candidates are potential patients to participate in the Clinical Study. They do not have statuses.
- Non-participants are those candidates who, after completing the baseline, are not allowed to be part of the Clinical Study because they do not meet the necessary requirements. They do not have statuses.
3.2.1.2 Alerts section
The top right section is used to manage the alerts generated during the course of the pilot.
For more information, refer to section 4.1 of the manual on the alerts functionality.
3.2.1.3 Graphic section
The bottom right section consists of an interactive graph that displays a summary of the existing patients and their status.

3.2.2 Creation and management of patients
3.2.2.1 Register new candidates and complete baseline data
When a data manager has identified a potential participant for the Clinical Study, the first step is to register them as a candidate. By clicking on the «New Candidate» button, a page appears where they must enter the person’s year of birth and gender. Upon clicking the «Register» button, the new candidate will be created with the preassigned ID. This ID will have the format «10XXX» indicated with «10», which represents a candidate. Candidates do not have a status.
After displaying a confirmation message, the user will remain on the same page so that if they want to register multiple candidates, they can do so more quickly.

During the first in-person visit of the data manager with the candidate, the baseline questionnaire must be completed to decide whether the candidate becomes a participant in the Clinical Study or not. To do this, the user should search for the candidate’s ID in the list and click on the associated «Fill Questionnaire» button. Upon doing so, a screen will appear with the 3 questionnaire sections that need to be completed.

When clicking on each of these sections, the questions related to different aspects of the baseline are displayed. The data manager must fill in all fields, ensuring not to forget to click the «Submit» button at the end of each section once they are sure that all questions have been answered correctly. Upon doing so, the questionnaire will be completed, and its title will turn green along with a checkmark icon indicating that it has been successfully completed.

If any of the answers indicate that the candidate should not participate in the Clinical Study, a button will appear allowing them to be added as a non-participant, so that they are registered in the list of non-participants on the main page. The format of their ID will change from «10XXX» to «12XXX», indicating that they are a non-participant.

If the questionnaire responses indicate that the candidate can become a participant in the Clinical Study, upon completing the 3 baseline questionnaires, the option to assign a kit to the patient appears on the same page. The user must select the kit they want to assign from those available at their pilot site, choosing the one with the appropriate shoe size for the patient. If no kit contains shoes in the necessary size, any kit should be assigned, and a replacement for the smart shoe device should be requested later. The format of their ID will change from «10XXX» to «11XXX», indicating that they are a participant.

Once the patient is saved, their page will be displayed. As a new participant, the completion status of the T1 questionnaires is at 12%. If possible, they should be completed before the end of the patient’s first visit.

3.2.2.2 View the information of a specific patient
To access the information of a specific patient, the data manager should search for their ID in the list of participants on the main page and click on the «See participant» button. On the left side, the following information appears: the participant’s ID, the assigned kit with the status of each device it contains, the participant’s status, their follow-up status, their creation date, and the expected completion date of participation in the Clinical Study. On the right side, the status of the patient’s questionnaires is displayed.

3.2.2.3 Complete questionnaires
The questionnaires become active according to the active period of the Clinical Study. To complete a questionnaire, the data manager must click on the period they want to access. Then, a page with the titles of each questionnaire appears, so that by clicking on these, the associated questions are displayed. The data manager must fill in all fields, ensuring not to forget to click the «Submit» button at the end of each section once they are sure that all questions have been answered correctly.
Once the data manager completes all the questionnaires, they must click on the «Block T1 Questions» button to register that the patient has finished the visit for that period.

4 Other general functionalities
4.1 Alerts
In the Alerts section of the main page, a menu allows switching between tabs showing the list of pending alerts, the history of resolved alerts, and the option to generate a new alert.
- In the Pending Alerts tab, alerts that have not yet been resolved are displayed.

- In the Alerts History tab, alerts that have already been marked as resolved are displayed.

- The Generate Alert tab contains a form where the user can fill out the following fields to create a new alert:
- Recipient of the message: the person to whom the alert is intended. The user must select the user type from the dropdown options.
- Pilot Site: the location where the message recipient is located. The user must select the location from the dropdown options.
- Free text field: the message content written by the user.

Once the above fields are completed, the user should click the button to send the alert.
4.2 Help
This functionality will be implemented in future versions of the tool.
4.3 Profile
The user can access this page by clicking on the top-right button on the homepage. Here, they can review their name, role, and avatar within the tool. Additionally, there’s a form through which they can quickly change their access password (they only need to enter the new password twice and click on the «Save» button). Finally, the «Log Out» button, allows the user to log out and return to the login page.

5 Technical support
5.1 Contact information for technical support in case of catastrophic failure
If the web tool is not accessible via the provided link, the user should notify us by sending an email to tolife_development@lst.tfo.upm.es
5.2 Preferred communication channels for issues and questions
The established communication channel for reporting usability issues with the platform or resolving doubts about its use is email.
The email address provided is tolife_development@lst.tfo.upm.es
5.3 Tool and user manual updates
The manual is continuously updated to the latest version on the website:
https://ecrs-dashboard-user-manual.tolife.dii.unipi.it/
New dashoard versions will be notified on the same website.
© 2024 Tolife Project. G.A. 101057103 | All Rights Reserved